29 June 2011

The mini series: apple apricot crumble pie

I couldn’t help myself. If I have something in mind I have to do it. I haven’t played enough with my molds yet so it was baking time tonight. I even skipped watching my show for it. Because I didn’t want to make to much and most recipes are for “large” quantities I decided to just wing it. For 24 mini apple crumble pies I used:

- 4 big tablespoons of self rising flour
- 1,5 table spoons of sugar
- a pinch of salt
- 2 tablespoons of cold butter
- 1 package vanilla sugar
- 1 apple diced in small squares
- some sprinkles of cinnamon
- 5 dried apricots cut in squares
You can use whatever apple you like; I had half a Granny Smith and half a Jonagold. I actually prefer Jonagold apples because they hold their shape pretty well and they have a nice sweet, slightly sour bite. I started with chopping the apples and mixed them with some cinnamon. I use a scissor to cut the apricot and mixed that in as well. Normally would sprinkle a bit of lemon juice on top to prevent the apples from browning, but I didn't had any. I figured they would be covered anyway, so no one would know.

I mixed the flour with the sugar, a pinch of salt, the vanilla sugar and the cold butter. I rubbed the butter between my fingers to get the crumbs and put half of it in a different bowl so I could use this to top the pie.
To the other half I added one table spoon of water and mixed it till it looked like this.
To make sure I had enough dough I made little balls first. I tried to make them more or less the same size.
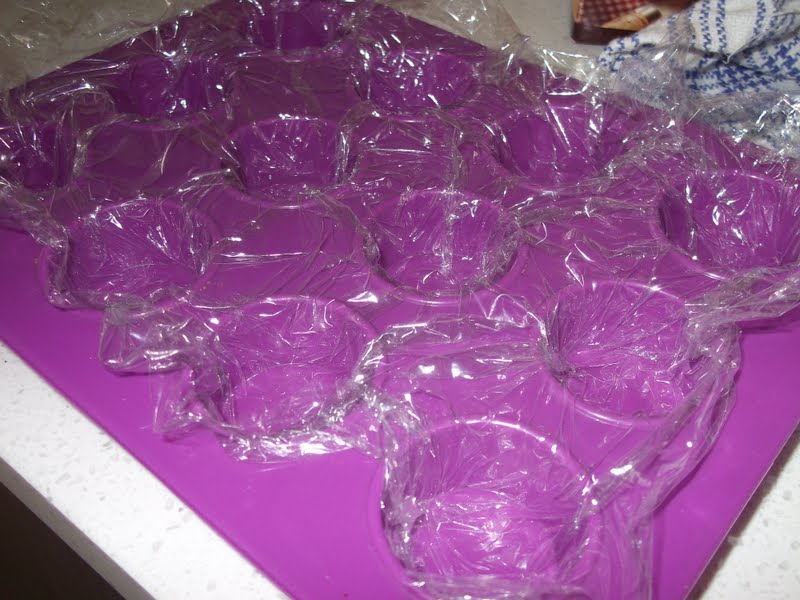
The molds were really small and there was no good way of evenly divide the dough. The only way to do it is to get one finger in there. And it helps if you have short finger nails.
I barely had enough dough for all the molds and if you want to cover the sides as well you would probably need one extra spoon of flour. This was enough for me though. 
I at first tried to fill the moulds with the apple mixture with a little spoon, but I found out that it was easier to just use my hands. And again I just had enough. A bit more would’ve gone to waste since I stuffed it pretty bad.

Now would be a good time to preheat the oven on 160C degrees.
I had enough time to put the crumbles on top and to make a big mess. There were crumbles everywhere!
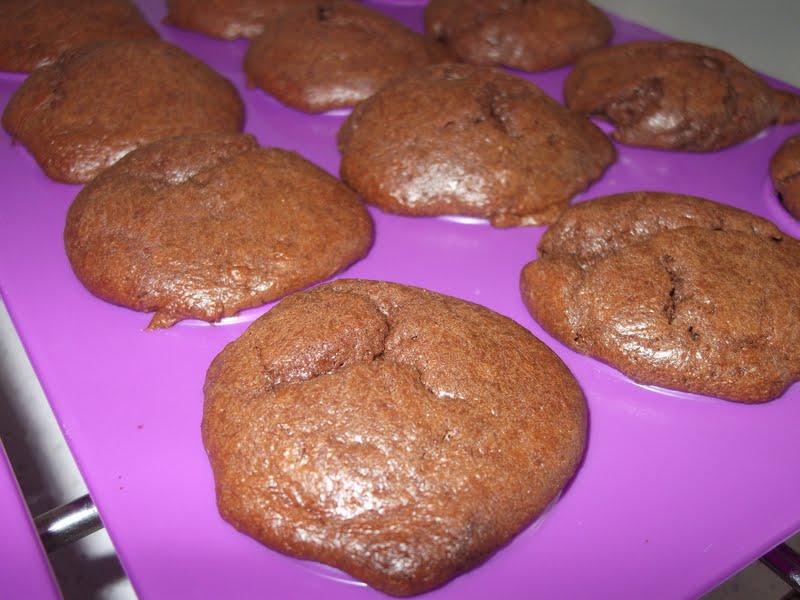
After 40 minutes in the oven the apples shrunk big time. The top didn’t brown much, but I didn’t want to burn the bottom so I took them out.
They turned out good, but to make them great I think I need to add more butter to the crumbles so they will clump together more and maybe get a bit of color. And some chopped hazelnuts sounds good also.

But I got the quantity right! 4 tablespoons of flour will be enough for 24 mini pies. I need a bit more if I want to cover the sides.
I am having one, or two or more right now!

28 June 2011

Peanut soup

I’ve been cooking loads of mini food with my mini molds but now it is time for a little break. Time for some real food. Something different…really different.


I used this to make my peanut sauce. Here in Holland we love our fries with peanut dipping sauce. I kinda made too much and I didn’t want it to go to waste so I turned it into peanut soup. It was dead simple.


This is what I used:
-          2 chicken legs and thighs
-          half a can of corn (about 4 tablespoons)
-          4 middle sized potatoes chopped in squares
-          peanut sauce (store bought)
-          salt and pepper, hot sauce
-          chopped spring onion
I stared with making a bouillon with the chicken legs and thighs. This means that after I rinsed them they went into boiling water with some salt till they were soft. Then I got the chicken out and let them cool a bit.

Now it was time to add the peanut sauce and the potatoes. Boil this till the potatoes are done.

In the meantime the chicken was cold enough to handle so I removed the skin and shred the chicken meat. Depending on your preference you can have big or small junks. I kept this aside till the last couple of minutes.
When they potatoes were soft I added the chicken, the corn and some dashes of hot sauce and let it boil for a little bit longer. A last taste test and then it was time to eat! To add more color I added some chopped spring onions.
The soup was so flavorful and even better the next day. I don’t think you can substitute the peanut sauce for peanut butter, but who knows. Make sure you try a small amount first!

27 June 2011

The mini series: tiramisu popsicles


My sister was requesting my “famous better then sex” tiramisu for her 30th birthday party and of course I can never refuse any request for tiramisu. So I got all the ingredients I needed and got started Saturday early in the morning. I believe I rolled out of bed at 8 and finished the tiramisu at 9is. I made a big tray enough to feed 16 people or 20 if you serve smaller slices and I still had enough left for 6 individual pots and 12 popsicles.    

I actually wanted to make more popsicles, but since they were so much work I thought I make 12 first.
I used some plastic wrap to cover my mini cupcake molds. I figured that this would make it easier for me to get the popsicles out.

Then I filled the molds with the mascarpone mixture and cover the top with some small pieces of lady fingers. I thought about sprinkling some amaretto on top but I didn’t want to make them soggy. I popped the whole tray in the freezer. 
It takes probably one or 2 hours to freeze it, but I went shopping and didn’t return till 2 so by then they were in the freezer for about 3 hours. They were frozen for sure.

I took them out while I was melting the chocolate and maybe I should’ve kept them in the freezer till the chocolate was ready. All I did was breaking half a bar of chocolate (about 100 gram) in a glass and melted it in the microwave.

I looked all over the place for popsicle sticks and of course every time you are looking for something you can’t find it, so I settled for toothpicks. To make sure they were able to hold I used 2.
Every popsicle got to dive in the chocolate and because they were still frozen the chocolate got solid quite fast. By the time I got to the last 3 I barely had enough chocolate left. Next time I need to use a bit more.

Here you go mini chocolate tiramisu bites!
I think next time I sprinkle some amaretto on the lady fingers before freezing them. The hubby liked it…the chocolate was very good he said. And I didn’t even make that part =)

25 June 2011

The mini series: chocolate cherry soufflé


I bought the cutest things the other day…mini (cupcake/muffin) molds. One mold holds about 12 mini cups and I bought 2 molds to start with. Then when I tried it the first time, making cupcakes from a store bought cake mix, I found out that 2 wasn’t enough. I needed at least 4 so a couple of days later I went out and bought 2 more. So now I am the proud owner of 4 mini cup molds.
These cupcakes were made with the new molds and if you look at the M&M you see how small they are. It doesn’t even take 2 bites to eat them! As much as I liked those cakes I prefer the ones made from scratch. These were much too sweet to my liking. At least when you make things from scratch you can control the sweetness.

I got inspired to do much more with the mold then just baking cakes. The mini series was born.
Because I didn’t want to make a big batch I had to adapt the quantity of the ingredients. I wanted to do something with cherries and chocolate and I had both of them at hand. I first put half a cherry in each cup. Then I mixed the ingredients together.

This is what is used:
-          150 gram butter
-          100 gram dark chocolate
-     1 egg 
-          1 teaspoon baking soda
-          1 teaspoon vanilla extract
-     pinch of salt
-          2 tablespoon flour
-          2 tablespoon quark
First I melted the butter and the chocolate in the microwave. It only takes a couple of seconds to heat it up. Then I stirred well till the mixture was shiny.
To a well mixed egg I added the chocolate. I also preheated the oven on 150 degrees.
Then I added the flour, baking soda, salt and quark.
After everything is mixed I use a little spoon to scoop this mixture in the molds. It was very difficult to put it in without spilling it and this was as good as it gets. I just had enough to fill 12 cups. By this time the oven is hot enough and I baked them for 30 minutes.
They came out so fluffy! It was something between a cupcake and a soufflé; a cupflé or a souflake? I’ll go with souflake =)
They were so mini I had to serve them on a teabag holder/dipping bowl.
The cherry went very well with the chocolate. And because I didn’t add any sugar they weren’t sweet enough. But that’s the way I like it. For those who like it sweet; some dusted powder sugar would help and will also make it look pretty.

Stir fried egg noodles


The hubby was requesting something simple for dinner so the wife didn’t have to cook a lot. Little he knows that the wife can’t cook anything simple. It always has to be lots and lots and lots. And of course it has to taste like heaven, or close to it. Both take time and effort. But she doesn’t mind most of the time. The hubby's wish is the wife's command. As long as he makes his wishes in advance, so the wife can get prepared.

So I went out and got all I need for this stir fry. I don’t have a fixed recipe but I always try to make it with lots of veggies. For this stir fry I got some baby bok choy, some flowering edible rapes, fresh shiitake mushrooms, fresh fried tofu and bean sprouts. Because we haven’t been eating shrimps for a while I decided to use some fresh tiger shrimps and pair it with a big piece of entrecote.

I started preparing everything first. You can slice it as fine or as rough as you like. I like big pieces and because I’m stir frying everything separate first I had big pieces.

I pealed and deveined the shrimps and sliced them in half. Then I sliced the entrecote in thick strips. I started by stir frying the entrecote very briefly with some onion, garlic, oyster sauce and sesame oil. I basically mixed everything together in the pan with the heat on. After everything is mixed and the meat is getting a bit of color I took it out of the pan.
After that it was time for the shiitake mushrooms and the tofu. I bought fresh tofu which I fried in some oil first. I made sure the there was a lot of heat so the mushrooms sheared and didn’t had the time to release a lot of liquid.

Then it was time for the baby bok choy and the flowering edible rapes. I use a big wok for this dish but I had so much veggies it almost didn’t fit. These veggies release lots of water and shrink a lot as well. So although it looked like much, it only filled half the wok after it was done. I stir fried this with just a little bit of water to get them going and some oyster sauce.

In the meantime I cooked the egg noodles in some boiled water till they were no long clumped together. Egg noodles here are like pasta…you have to boil them first before you can process them.

By this time the veggies were almost done. Now it is time to combine everything. The noodles went in first, then the meat and the shrimps, then the mushrooms and almost at the end the bean sprouts.
Because everything was stir fried separately first this dish is done when the shrimp is done. I had a last taste and added some more salt and grounded pepper before serving it.
I love it when the hubby requests noodles. It is easy and you can use whatever veggies you have in the fridge. It is also a great way of getting rid of your leftovers.

23 June 2011

Xoi bap (sticky rice with corn)


Mom brought some dried corn from Vietnam and because all of us would be home that weekend she made xoi bap for us. Not because we liked it so much but because she needs extra helpers to eat it. So mom this one is on you.

Actually mom started the dish and I finished it off. It was quite easy to make but very time consuming. Mom soaked the dried corn overnight and then had to cook it for 8! hours before it was soft enough. What kind of corn did she get?!? No wonder vendors in Vietnam hardly sell xoi bap anymore.

After she cooked the corn she mixed it with some raw sticky rice and steamed it till the sticky rice was done.
By this time the mixture looks like this.
On top of that I put some cooked and smashed mung beans. My mung bean mixture wasn’t suppose to be that wet, but that was no reason to waste food.
Then the hubby’s favourite….crispy fried onion. He likes the store bough ones, but he loves the fresh fried ones!
To top it off some good scoops of the sesame/sugar/salt mixture. I use raw sesame seeds which I toast in a non stick pan. Then I smash them a bit so they can release even more flavour and mix them with a bit of salt and a whole bunch of sugar.


Every scoop should have a little bit of everything. At first you’ll think…kinda odd combination, but once the flavours come together….it is very addictive. It’s the hubby’s new favourite.

19 June 2011

Fried dumplings

For lunch I was craving fresh cut fries. Although I don’t have a frying pan; well I do have a frying pan, but I  retired it because it was such a hassle cleaning it every time, I do all my frying in a regular wok. It works perfect. You still have to clean it but it’s not so bad.
I pealed a whole bunch of potatoes and chopped them. I like thick fries, the hubby like thin fries. But if you want to fry it quick you want them thin, so thin fries it is.

I always fry my fries twice; one time to cook them and the second time to make them crispy. But it is very difficult to make crispy fresh fries; although I fried them twice they were still soft. The precut fries out of the freezer will always be crispy after frying them twice, so maybe freezing them is the key.

Anyway they were very tasty with a sprinkle of salt en pepper. Here in Holland we like to dip them in a mayonnaise/curry/tomato ketchup mixture sprinkled with some finely chopped raw onion. Well we actually don’t mix them but put the 3 sauces together in one bowl and put the onions on top. While eating you can either mix and match whatever you want. My hubby thought the combination was very odd, but it works. Give it a try and let me know what you think.

Since my wok still had lots of oil and I hate it to go to waste I thought I use it one more time for frying some dumplings. I had a store bought dumpling package in the freezer which I defrosted so I had time to make the stuffing. 
I bought these beautiful fresh shiitake mushrooms for dinner and thought they would taste great in the dumplings.

I still had some minced chicken/turkey/all kinds of add-ons my sister bought earlier thinking it was minced chicken only, so I used that. One mistake she’ll never make again. I asked her to go and get minced chicken and she thought she did, because the label said so, but if you read the ingredient list it had all kind of other stuff in there. It wasn’t bad, but if you want to buy minced chicken you don’t expect it to have turkey meat and other stuff right? So if you buy stuff at the supermarket….always read the label so you know what’s in there!

To the meat I added some salt, grounded pepper, garlic powder, one fresh grated garlic, some sprinkles of sesame oil, one finely chopped onion and about 4 big shiitake mushrooms finely chopped. And I put a dash of Worcestershire sauce in there as well.
My sister was helping me in the kitchen with chopping onion and shiitake mushrooms, while I was cleaning and deveining the shrimps for dinner. I love shrimps in all sizes and shapes. I normally have a bag of fresh headless tiger shrimps in the freezer just in case I need it. I thought some shrimp would taste so good in the dumpling so I put some aside just for this.
 
My mother in law taught me to flatten the shrimp with a knife first before mincing it, so it would still be “chewy”.
I minced the shrimps as much as I could and put them in the bowl together with the meat. 
After I mixed everything together I thought some chopped spring onion would be nice so I added that and I also added some really finely diced fresh ginger. Now the stuffing was done.
I scooped a little bit of stuffing on the dumpling and use my finger to put some water on the outside.
I scooped a little bit of stuffing on the dumpling and use my finger to put some water on the outside. I folded it and made about 4 little “S-es” that I pressed together. I had to make sure there is no air inside and that everything is sealed.
I continued doing this till all the dumplings were stuffed.
Then I fried them in enough oil to cover at least one site. You really have to keep an eye on them because the brown very fast. And they splash a lot also so don’t come too close.
When they are golden brown get them out and put them on some paper towels so it can soak up some of the oil.
They are really good on their own, but can be dipped in some sweet and sour sauce as well.
Every bite had a burst of flavors! 
I still had some stuffing left so I stuffed it in some fried tofu and fried them right after the dumplings were done. Another great combination!