27 January 2013

Garlic shrimps

I hope everyone had a great weekend. Mine was filled with grocery shopping and watching movies. With the snow and all I’m not really in the mood to do anything else. But today it started to rain. I never thought I would be so happy to see rain. The snow just melted away. Having 2 weeks of winter with snow and scrapping my car windows is more than plenty for me. Please let the spring start soon.
On Saturday I bought a bag of frozen, peeled and deveined shrimps. Talk about shortcuts. Normally I buy them with shell, so this was a nice change. I always try to have a bag of frozen shrimp in the freezer. Never know when I need them.
I don’t know if I should call this post garlic shrimps or shrimp garlic given the amount of garlic I marinated them with. I know my boss will not be too happy tomorrow at work. Somehow he always knows when I had garlic. But that doesn’t stop me from eating it. I just love garlic!

For these super simple garlic shrimps I used:
-       About 25 pieces of peeled and deveined shrimps
-       4 cloves of garlic
-       1 teaspoon of salt
-       Fresh ground pepper
-       Some slivers of fresh chili
-       1 teaspoon of garlic powder
-       Dash of olive oil
I started with mincing the garlic and sliced some slivers of chili. I don’t like it too hot so just a couple would do.
To this I added the salt, the pepper, the garlic powder and the olive oil.
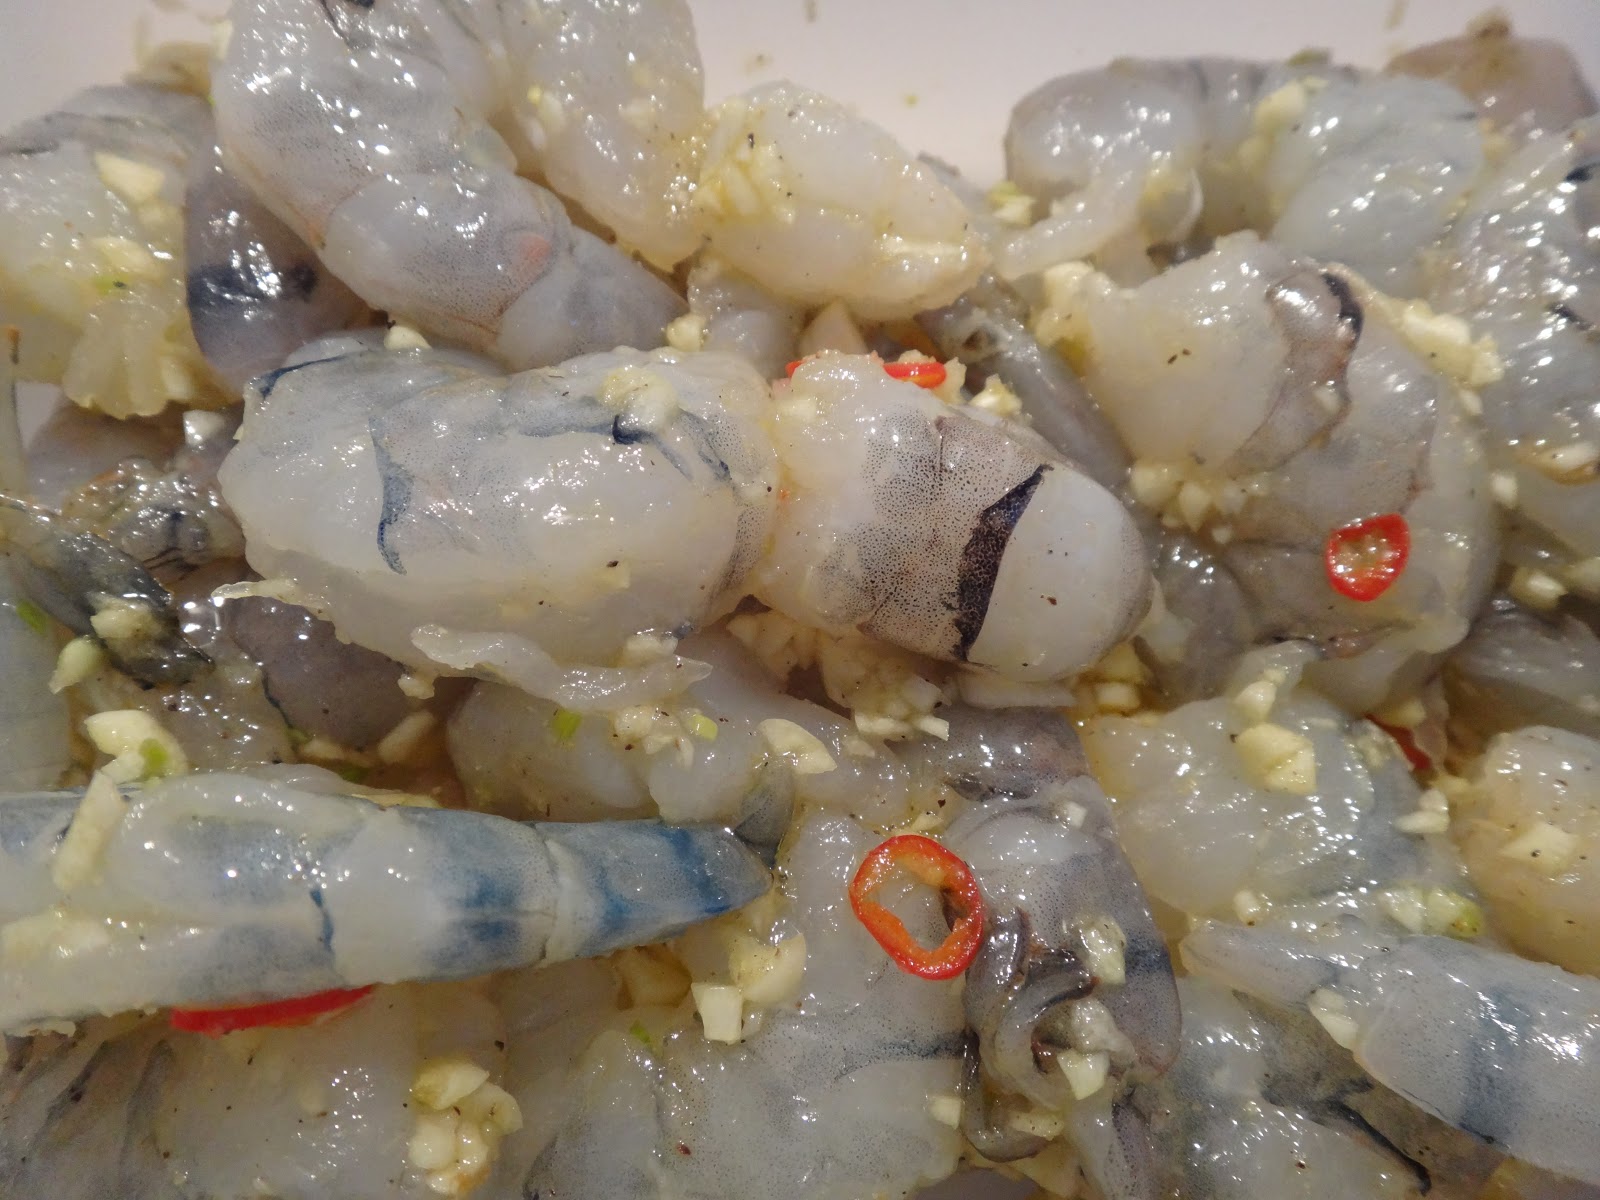
Then I butter flied the shrimp, making sure I didn’t cut them all in half and mixed them with the garlic mixture. I let it marinate for a day, but if you are in a hurry you can use it after a couple of minutes also.
In a hot wok I added a bit of olive oil and one teaspoon of butter. The moment the butter melted in the oil I added the shrimp.
Shrimp cooks so fast, so the whole process took no longer then 2-3 minutes. There is no doing anything else while the shrimp is cooking so you’ll have to be there and keep an eye on them. When one side was done I turned them around and after everything turned pink it was time to serve it.
We ate it with some toasted bread, but it was good just like that also; a great, fast and simple snack before dinner.
PS: try these shrimps on top of a salad!

20 January 2013

Lemon passion fruit semolina cake


I know it is bit late but I think it is never to late for a happy new year! I hope this year will be all that you want it to be.
Looking back at last year I can say that it’s been a very good one. Now that I’ve think about it, I don’t think I had any bad year at all. Or maybe I’m just good at ignoring any bad past.
Anyway it’s been really good taking a break from blogging and focusing more on getting healthier. I’ve stopped running since the days are getting shorter and the nights longer, but as soon as the temperature goes up to somewhat decent running temperature; I will be picking up where I left. Still have that wedding to go to in June...So far I haven’t gain any kilos, but I’m afraid I can’t hold that off for long.

I checked my pantry and notice that I had a bag of Semolina that was about to expire. I looked everywhere for a recipe and then I remembered that my Greek neighbor use to make semolina cake. All the recipes I saw were using 6 or more eggs. Somehow I just can’t justify using 6 eggs just for 1 cake. So lucky I found this recipe and decided to tweak it a little: http://www.taste.com.au/recipes/20192/lemon+semolina+cake

For the cake I used:
-       130 grams of unsalted room temperature butter
-       ½ cup of sugar
-       Zest of one lime
-       2 eggs
-       ½ cup of milk
-       2/3 cups of all purpose flour
-       1 ½ cups of semolina
-       1 teaspoon of baking soda
-       ½ teaspoon of salt
Since I had a lot of passion fruits I decided to use them in the syrup.
-       ¼ cup of passion fruit juice
-       1 cup of water
-       1 cup of sugar
-       Juice of 1 small lime
-       Pinch of salt
I started with creaming the sugar, the butter and the lime zest. 
Then one by one I added the eggs. After the eggs were incorporated I added the milk.

I preheated the oven on 180C degrees.
In a different bowl I mixed the flour, semolina, baking soda and the salt. After the milk was mixed in I added the dry ingredients. I used a spatula to mix it a bit first and then with the hand mixer I made sure everything was mixed well.
I use a bit of butter to grease a square baking tin and added the mixture. I made sure it was somewhat flat on top.

The cake was in the oven for about 40 minutes.
This gives me more than enough time to make the syrup. I cut about 7-8 passion fruits in half and scooped out the seeds. It went into a pot and on the fire so it can boil for a little. After that I drained the seeds and poured 1 cup of water on top. I made sure I extracted as much flavor as I could. Then the pot went back on the fire. After it boiled it added 1 cup of sugar, a pinch of salt and the juice of 1 small lemon. I let the syrup boil for about 8 minutes.
By now the cake is done and has a really nice golden crust. To make sure the syrup can go through the whole cake I punched some holes. Then I poured about 2/3 of the hot syrup on the hot cake.
After it cooled for a bit I cut the cake in squares. I can see that the cake has not sucked up all the syrup so lucky I had some left so I could pour a bit more on top.

It was a very nice and easy cake to make. The only thing I would do different is I would double the amount of syrup so I can let the cake soak in more and maybe shorten the oven time to 30 minutes. This time I only poured it on top so the cake wasn't wet enough for me. Still a very good first try.

06 September 2012

Canh dau hu he (tofu chives soup)

As you know I haven’t been blogging much (well not at all) anymore, but I’d like to give you an update of what is going on. Since I stared running I’ve been able to lose 6 kilos in total! I’m still trying to get rid of the last couple of kilos, which are the hardest but I’m heading in the right direction. I’m on 58 right now and my goal is 55. I know it won’t make me happier, but it will for sure make me feel better about myself.

There is no secret in losing weight and unfortunately there is no easy way to do it either. It’s something everyone knows, but so it’s hard to follow. All you need is to eat less and to exercise more. Easier said then done for sure.

To loose the weight I had to cut back on carbs (only one carb meal a day, which for me is two sandwiches for lunch) and have as less carbs as possible for dinner. Sometimes a bit more and sometimes a bit less.
And I’m running at least twice a week for 45 minutes per run. If possible every other day would be even better, but with the Dutch weather that is not always possible. No running in the rain for me.

I eat a lot of veggies and salads and cut out most fried food. And I drink lots of water, at least 2 litters a day. No snacking…well ok every once a while in a blue moon…you’ve got to live a little right?

I just love soups and it’s something I can eat every day. I pack mine with lots of veggies and some kind of protein; minced pork, beef or chicken.
This is soup is inspired by some freshly grown Chinese chives. My mom grows them in their back yard and ask me to take some home. These plants are so strong, they keep coming back, even after the cold cold Dutch winters.
It’s one of the easiest and fastest soup you can make and not only that, it’s also sort of healthy for you. At least that’s what I think =)

You can make the stock with all kinds of meat, but I prefer pork. It’s what I grew up with so that’s what I’m using. My mom usually make it with thinly sliced pork, but since I had some pork ribs I used that.

For this soup you need:
-          some pork (ribs or whatever you have at hand)
-          salt, pepper
-          1 fresh tofu
-          handful Chinese chives
-          1 tomato (I didn’t had one, but if I had I would put it in)
-          2 beaten eggs
I cooked the pork ribs with some salt and pepper till tender. If I had a tomato I would quarter it and add that at this point. To have a clear broth I scooped the foam off a couple of times.

You can cut the tofu anyway you like (mine were square) and add it to the broth. Boil everything till the tofu is cooked.
I stirred in the eggs to get egg threads and just before I was ready to serve I added the chives.
All I had to do then was to boil it for a couple of seconds and it was dinner time.
For some extra flavour I sprinkled some spring onions on the top. I ate the soup just the way it is, but for those who love their carbs, you can also eat it with rice.

Enjoy!

18 July 2012

What am I up to...

I realize it’s been too long since I logged on my blog and it’s even longer since I took time to visit other blogs. Remember a couple of months ago I wrote that my relationship with food would totally change? That was like beginning of the year…Nothing really happened till the end of May when I actually started to change my eating habits. I’ve been cutting down on carbs and increasing the exercise. Every day the weather is nice I try to get my running gear on and go for a run for about 30-40 minutes. I was lucky that so far I manage to run a minimum of 2 times a week and in a good week it’s 4 times.

I’m happy to say that now I can run the whole way without needing to stop and catch my breath. I’m also very happy to lose 4 kilos making my weight a total of 60 kilos. Not bad for 2-3 months of exercising and cutting down on carbs. But it hasn’t been easy and I didn’t want to tempt myself by looking at all the good stuff everyone is blogging about, so I kept a very low profile. I want to reach my goal and bring my weight back to 55 kilos so I still have some losing to do. I know I can do it, because I manage to do it before, and I want to do it the right way. Once I reach this weight I just need to maintain it and that’s even harder than losing it in the first place. I’ve been neglecting my body and I really need to feel comfortable in it again. Besides I have a wedding in California next summer and I want to wow everyone there =)
I’m also thinking about what I want to do, since my work is no longer satisfying. It is just not the same anymore with all the rules (that can change per day). It used to be a very good job with all the extra little benefits, but without them, it’s just a job like no other. It’s a shame because I’ve been working there for 10 years and it’s almost my second home. The week always went by so fast and I never mind going to work and go that extra mile if needed. Now I just go in, do my job and go home asap. I miss the good old days, but I’m afraid they are gone forever. So if I don’t work here, what will I do then? It’s a question I haven’t been able to answer yet.
So my dear friends, I haven’t forgotten about you. I’m doing well but just need time to work on myself and to find something I like to do...
I hope to get back to blogging soon. I still have some great recipes I want to share. Unfortunately great recipes are mostly not the healthiest ones!

16 June 2012

Fried chicken fingers

The Dutchies are very very nuts about soccer and the last few weeks the streets were decorated with orange flags. Holland has one more chance to go to the next round, but if they lose the next game I’m sure all the orange will disappear soon. I’m not a big fan of soccer. Well I’m not a fan at all, so while my hubby is watching the game I had time to prepare some finger food. I wanted to buy some chicken nuggets at the supermarket, but when I saw that only 80% was chicken and the other 20% something else I decided to make some myself. At least it will have 100% chicken in it.
I used 3 chicken breasts which I rinsed, dried and cut in finger size bits.
Then I set up my batter station.
To my store bought bread crumbs I added some salt, pepper, garlic powder and some freshly minced parsley.
To get a really nice crust on the chicken I covered it first with some plain flour. Then it went in the egg mixture and last in the bread crumbs. I know I could probably bake them in the oven, but since we were all pretty hungry I fried them in some oil.
It only takes a couple of minutes to brown and after they are done I drained them on a piece of paper.
The chicken fingers were so good they disappeared in no time.
The parsley really gave it a nice touch and although I didn’t season the chicken first they were still full of flavor and super moist.
My hubby already said no more KFC for him since these chicken fingers were way better!

Hope you all are enjoying the weekend. I'm going back to the kitchen for a father's day
Black Forest cake or Schwarzwälder Kirsch cake.

10 June 2012

Strawberry cloud birthday cake

Today marks a very special day for one little lady. Although it’s her 22nd birthday in my eyes she’s still little…that is till I realize how old she is. It makes me old thinking about it. In my mind I’m still 25 at most…

Since it’s her special day I’ll tell you a little something about her. You’ll have to know that my family has 4 girls and she is the last in the row. My other sisters and I are 2 and 4 years apart, but since this one was an attempt of having a boy we are 11 years apart. I remembered I had to take care of her when she was a baby because I was the big sister. Even now I’m taking care of her since she lives with me and my husband while she is in college here in The Hague. Our deal is: you pass every year and granulate or you go back to mom and dad. So far so good…she’s still here.
For her birthday she didn’t want to invite any friends over. Instead she’s at home playing on her laptop and chill out. This doesn’t mean that there is no cake. I saw this cake on Annabel Langbein’s show. Again one of those easy to make cakes that I had to give it a try and I followed her recipe to the letter. Well almost to the letter. Click here for her recipe.
The only thing I did different is using about 300 grams of whole grain biscuits and about 300 grams of strawberries.
I like a thicker biscuit layer so I used more biscuits. Here I’m mixing up 300 grams of biscuits, 100 grams of melted butter, 2 cups of shredded coconut and 1 teaspoon of cinnamon. 
What I would do different next time is mashing the strawberries first before mixing it. Because I left the strawberries still a bit chunky they went flying everywhere when I started mixing it. I’m mixing 300 grams of strawberries, 2 egg whites, 1 cup of sugar, 1 teaspoon of vanilla extract and 1 tablespoon of lemon juice.
Also I would mix it on low speed first and then increase it to max till it fluffs up. And I would mix it a bit longer too. This morning when I checked on the cake some of juice was running out of the cake.
This probably means that I haven’t beaten it well enough. I would also reduce the sugar; 1 cup was a bit too sweet, so I’d go for ½ cup next time.
The cake was really fluffy and tasted like cotton candy. Who knew you could make something this easy with just 2 egg whites and some soft fruits.
Apparently you can freeze this cake to so after we all had a slice I put it in the freezer. Hopefully it tastes even better frozen!
Happy birthday baby girl!

07 June 2012

Chocolate Truffles

I used some of my ganache as a topping for my chocolate cakes (also a recipe by Annabel and will follow soon) and I still had so much left. I only used 250 ml whipping cream and 250 grams of chocolate, but it was still more then plenty to coat a big cake. 
So I used part of it for some chocolate truffles, just like Annabel. She said whenever she made ganache she always have to make truffles. They were easier to make then I thought.

I poured some warm ganache in a bowl and added some butter. Depending on how much ganache you have, I’d use a tablespoon of butter or a teaspoon. A little bit goes a long way, but if you don’t put enough butter in it won’t get hard. That’s not a problem since the flavour will still be good; it’s just difficult to roll it into little balls. I also added a bit of liquor. I had Amaretto at hand so I used that, but I know some like Cointreau.
After it’s all mixed it went in the fridge so it could harden.
In a different bowl I mixed the ganache with some shredded coconut and some butter so I could have 2 flavour truffles.
I used a teaspoon to form little balls and roll them between my hands. After that I dropped them in coco powder and swirl the bowl around so the truffle gets a nice coco layer. I found out that it’s less messy if you just scoop a table spoon of ganache straight in the coco powder and form them into balls after they are coated.
As you can see I didn’t make too much…Have you noticed the little chocolate cupcake in the back?
This is all we have...thank god, because they were so good I could eat them all in one time!

Chocolate Ganache

Have you ever heard of Annabel Langbein aka the Free Range Cook? She’s this Australian lady who pretty much grows everything in her garden and who makes fantastic food using whatever she grows. Of course you can’t grow a cow or a pig so she gets her protein from farmers markets and friends. If you watch her show her food looks so easy to make, you can easily copy after watching the show.

What she has, is considered one of my dreams…to have a great big garden with all kinds of fruits, veggies and herbs.

I love to see her disapear in her garden and come out with all kinds of veggies and fruits. So far I’ve been able to grow is some viges, blueberries, grapes and a couple of herbs; nothing comparing to what she gets out, but it’s a start.

This year my peony bush finally bloom! I bought this tiny little sprig and finally after 2 years it gave me 7 flowers in total.
Isn’t it pretty?
It’s overpowering my grapetree right now so I’ll have to do something about it this weekend. I grow it right in front of the house so it’s the first thing I see when I leave the house. One of my neigbours even complement me on it. She loves passing by and see the flowers blossem a bit day by day.

Anyway the other day she made chocolate ganache in her show. Her recipe was just too easy: equal parts of whipping cream and dark chocolate. She used 500 ml cream and 500 grams of chocolate. And she always uses the best chocolate she can find. Since I don’t really taste the difference between high quality chocolate and cheap stuff, I go for the cheap stuff. Maybe when my taste buttons develops more I’d switch to the high end stuff.
All you’ll have to do is cook the cream till you see little bubbles form on the edge of the pot. Then take it off the fire and put all the chocolate in.
Let it sit for a couple of seconds and then mix it all together till it’s one smooth and shiny mixture.
Pour it in a jar and store it in the fridge. How simple is that?

This ganache is a great base for chocolate truffles which I, just like Annabel, also ended up making.